Introduction
In the first part I showed and described the installation of XenDesktop, Citrix Provisioning Services and the corresponding agents. We will continue where we ended the first article, starting the image wizard of the Citrix Provisioning Services agent.
Creating the vDisk
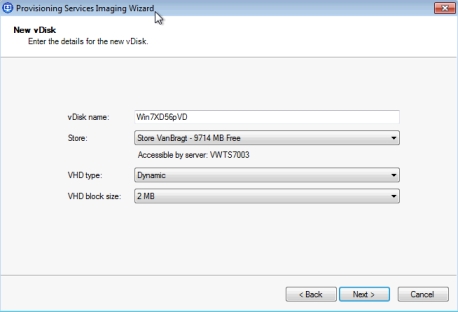
If you did have worked with Citrix Provisioning Services for some time the creation vDisk process is pretty changed. The wizard starts my specifing the CPS server to connect to the CPS Farm. The second step is to create the vDisk within the farm by specifying the vDisk name, on which Store the vDisk should be stored, the VDH Type and the VDH Block Size. In the case you already have vDisks available; you can also select an existing vDisk.
Next you need to specify a device name (not the current computername which is already in Active Directory). The device will be created within PVS, with the correct settings for the process of imaging the master machine.
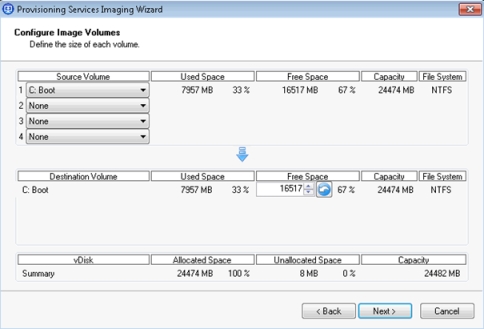
Per vDisk you can specify which MS licensing technique will be used, you can choose between None, KMS or MAK. Next is specifying the size of the vDisk, by providing the free space you would like to add to the current used disk space of the image machine. Also when the image machine has more disks available you can specify if those disk should be taken into account during the capture process.
The last step is to specify which optimizations should be performed (best practice is to do all of them or that should be a real important reason to skip one). The wizard ends that the vDisk is created successfully and that the machine should be rebooted to start the imaging process.
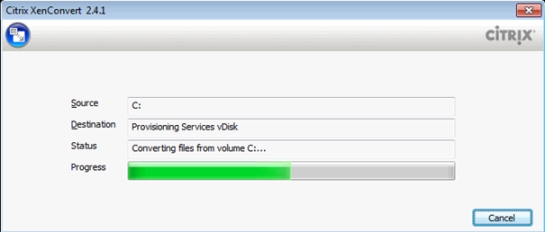
After the reboot you need to boot the machine into the PVS infrastructure using the configured PXE boot or Boot Device Manager ISO. After the startup phase the image will be made automatically using a XenConvert based process.
When this process is finished you are ready to go to create CPS targets using a personal vDisk. I noticed during the proof of concept phase that sometimes the personal vDisk update process was started when booting up the shared vDisks. As a best practice I booted the vDisk in private mode (startup with the vDisk) and run the Personal vDisk process update once again. After that you can change the image type within CPS to Standard Image at the Access Mode of the vDisk.
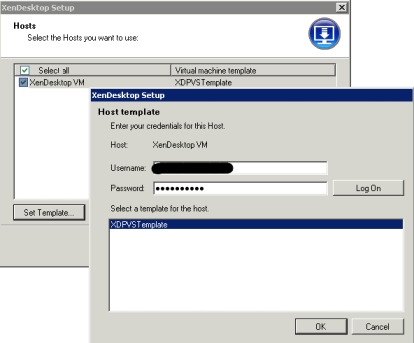
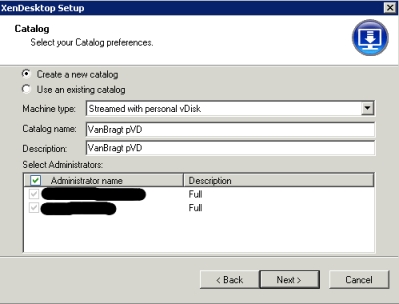
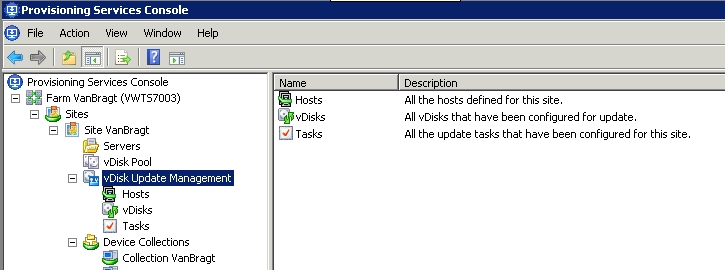
Again if you don’t read the manual you expect that the next step should be done within the XenDesktop console, especially when the Catalog wizard shows the machine type option Streamed with personal vDisk. However this is not the way, the creation of the catalog type should be started out of the CPS console. In the right-mouse menu of the Site component the option XenDesktop Setup Wizard can be found. Again a wizard is started, which starts by specifying a XenDesktop Controller, followed by specifying the earlier within XenDesktop configured connection to the Hypervisor (and storage). Within your Hypervisor you should have (an empty) template machine available which will be used for creating the other virtual desktops. Logically you did not do that before you start this process, so probably you need to start-up the Hypervisor Management Console create a Virtual Machine with the correct hardware settings and convert that one to a template.
Logically you need to specify which vDisk (only in standard mode vDisks will be shown) you want to use. The next step is to select or create a catalog. In this step you specify Streamed with personal vDisk, combined with the catalog name, description and the administrators group (specified within XenDesktop).
In the next screen you need to specify how much virtual machines should be created. You should remember that using the pVD technique however it looks like a pool, each user will get his dedicated virtual machine assigned as the personal vDisk is connected to a VM (t it only keeps out personal data out of the base image, but it is not moving between pooled VMs currently). You can specify the amount of CPUs and Memory per VM. Also you can specify the size of the personal vDisk, by default it’s divided by a ratio of 50 by 50 % for profile/personal data and installed applications. This ratio will not fit most organizations and can be changed via registry settings as described in this article by Nick Rintalan.
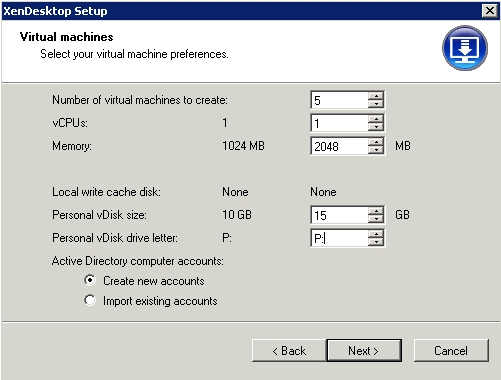
Last option is to specify which drive letter should be use of the data/profile part of the personal vDisk. After specifying the location of the computer account within Active Directory the actual process can be started, creating the whole configuration within PVS, XenDesktop, the Hypervisor layer, Active Directory and the preparation within the VM.
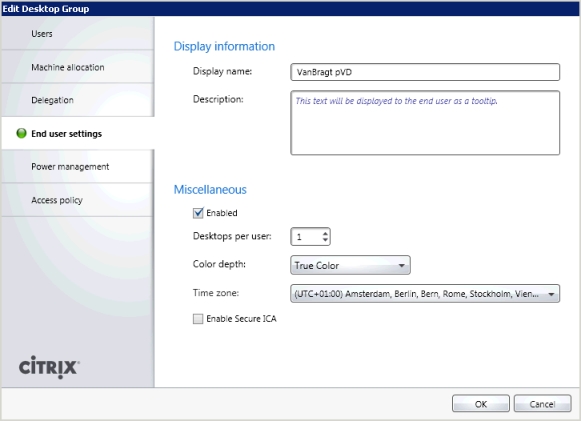
After this process one step need to be made by setting up a Desktop Group which assigns Users/Groups to machines within the catalog. Besides the assignment you can also configure delegation control, user settings, Power Management options and an Access Policy (via which methods a user is allowed to start the desktop).
Logically the created machines need also be booted up using PXE or Boot Device Manager ISO file to start-up. In my PoC no DHCP server was available, so I used a separate Boot Device Manager ISO file for each Virtual Desktop.
Using the personal vDisk
After the assignment the user can start using the Desktop logging in via the Citrix Access Gateway or the Web Interface. When using the Web Interface installed with XenDesktop the autostart feature is enabled when one Desktop is assigned to the end user. When the user is working on the machine he can install applications (logically you need to provide the user enough rights within Windows). These are stored on a hidden drive (by default the v: drive). Because it’s accessible by default, you can just type in V:, but you will see the content of your C drive.
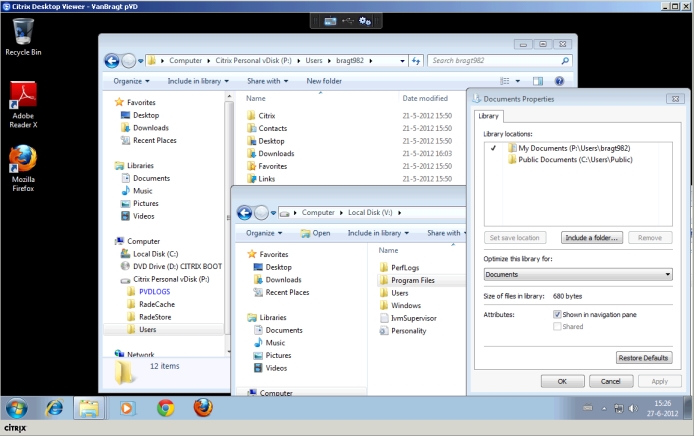
The P: drive (by default) will be used to store the profile and user data on it. The Personal vDisk component automatically arranges that the userprofile and libraries are redirected to the P drive.
According to Citrix using a pVD has an overhead of 25%, with Windows XP this is even 65%. Citrix goals are to lower the overhead to 10/15% for Windows 7. Logically they will not focus on Windows XP anymore.
Updating the vDisk
The real cool stuff of the personal vDisk component is the possibility to update the base image with hotfixes and/or updated/new applications while the user installed applications will still work on this new image. Updating the base image within Provisioning Services can be done via several methods.
Unfortunate you cannot assign a new vDisk to a PVS target with pVD, so building a complete new build is a bit more complicated. However making minor adjustments to the vDisk are less complicated in comparison with earlier versions. For such updates there are two ways, the automated updated way and the manual way. The automated way works together with SCCM, WSUS or a custom script (created by you). Unfortunate I did not have the time during the PoC to go into more details of this part and try I out, but it looks really promising way to add for example hotfixes into the base image. In this knowledgebase article Citrix explains the whole process, but I doubt that this is the exact way to be using this as the eDocs describe those steps differently.
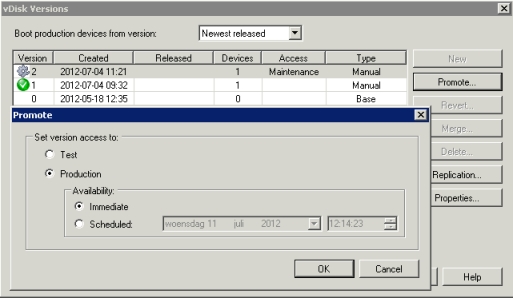
I used the manual way to update the vDisk to test if applications/settings are retained when you update the base image. To update the base vDisk you select the disk and choose Versions out of the right mouse button menu. This will show the versions available of the vDisk. By choosing New a new version will be created, the technique behind will create a differential disk. A new version is labeled by default as maintenance. Only CPS target labeled as maintenance can use this disk, by choosing the disk out of the boot menu shown at startup of those machines.
Such a disk is available in a kind of private mode, so actions performed will be recorded. When the changes are done, you can change the version to a test of production level using the promote button. When you promote the version to production all machines will use this version as the main vDisk. In other words the complete update process can be done using the main vDisk while daily operations are not affected. As I mentioned earlier in the PoC I did not have PXE or DHCP available, so I used BDM to start-up the machines. When using this feature the boot menu was shown, but directly after that an error message “No Arp reply” was shown. Happily I was not the only one and Mike Meyer found a work around for it (it looks like we found a bug in PVS). It should work in the normal way when using PXE as Mike is also stating.
I just installed a few new applications, run the vDisk update wizard, shutdown the machine and promote the disk to production. After a reboot the PVS target had the new image including the new installed applications and also still the applications installed by the end-user were available. It’s good to know when you have conflicts, the base image always have a higher preference than the pVD. So when both the main vDisk as the pVD have Adobe Reader X installed, because the main vDisk is updated, the Adobe Reader part will be used out the main base image.
If you would like to build a complete new main vDisk without using the wizard again you could create a new difference disk via the series option. Install the master image machine as building a new machine. Configure a machine to boot from hard disk instead of vDisk in the maintenance mode connected to the vDisk. Format the vDisk (for example by using the mount option in the provisioning services console). Boot the master image and do the normal steps to create a new vDisk. Logically this will create a big difference disk, so it is advisable to use the merge function.
Conclusion
From a technical standpoint the personal vDisk technology is really cool, especially the part that you can update your master image and applications installed by end-users within their PVD are retained. However just like with normal VDI deployments the use case is a bit more complicated. When you are building VDI for personal/persistent desktops, then the personal vDisk is real good options to limit the amount of storage required for the VMs and simplify the management of the main components. Don’t forget the overhead penalty, currently about 25% according to Citrix. Also remember the default split between profile and applications in corporate networks. In general I really like the technical part, I see some improvements in the management and set-up (configuring without the wizard) and also the update process for using a full new main vDisk is not easily to perform at this moment.
Addition:
From a real PoC you would like to go one step further by also testing load, performance and other factors. However when we reached that phase, the customer decided to do stop with the PoC. The urgency was gone and there were lots of others activities that should be finished, so those steps are not performed (till now).